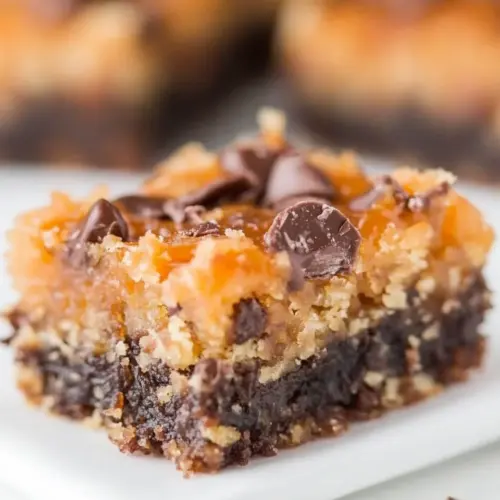
Better Than Girl Scout Samoas Cookie Bars
Every time I think about the flavors of childhood, the memory of Better Than Girl Scout Samoas Cookie Bars comes rushing back. These bars are reminiscent of those beloved cookies we all waited for each season, but packed into a pan for easy sharing and indulging. I remember the first time I made these; the entire house filled with the sweet aroma of melting chocolate and toasted coconut, pulling everyone in like a warm hug. It was a rainy afternoon, and as I watched the bars bubble in the oven, I felt a wave of nostalgia. This recipe, inspired by those iconic treats, allows you to bring that joy home anytime. It’s perfect for family gatherings, after-school snacks, or simply when you want to treat yourself to something sweet. You can’t beat the combination of textures and flavors, from the rich chocolate to the chewy coconut. Trust me; once you take that first bite, you’ll be transported back to those carefree days of youth.
Recipe Snapshot
35 mins
10 mins
25 mins
Medium
210 kcal
2 g
Keto, Gluten-Free, Low FODMAP
10 g
Mixing Bowl, Frying Pan, Baking Sheet, Food Processor, Oven
Why This Better Than Girl Scout Samoas Cookie Bars Hits Different
The Ultimate Treat
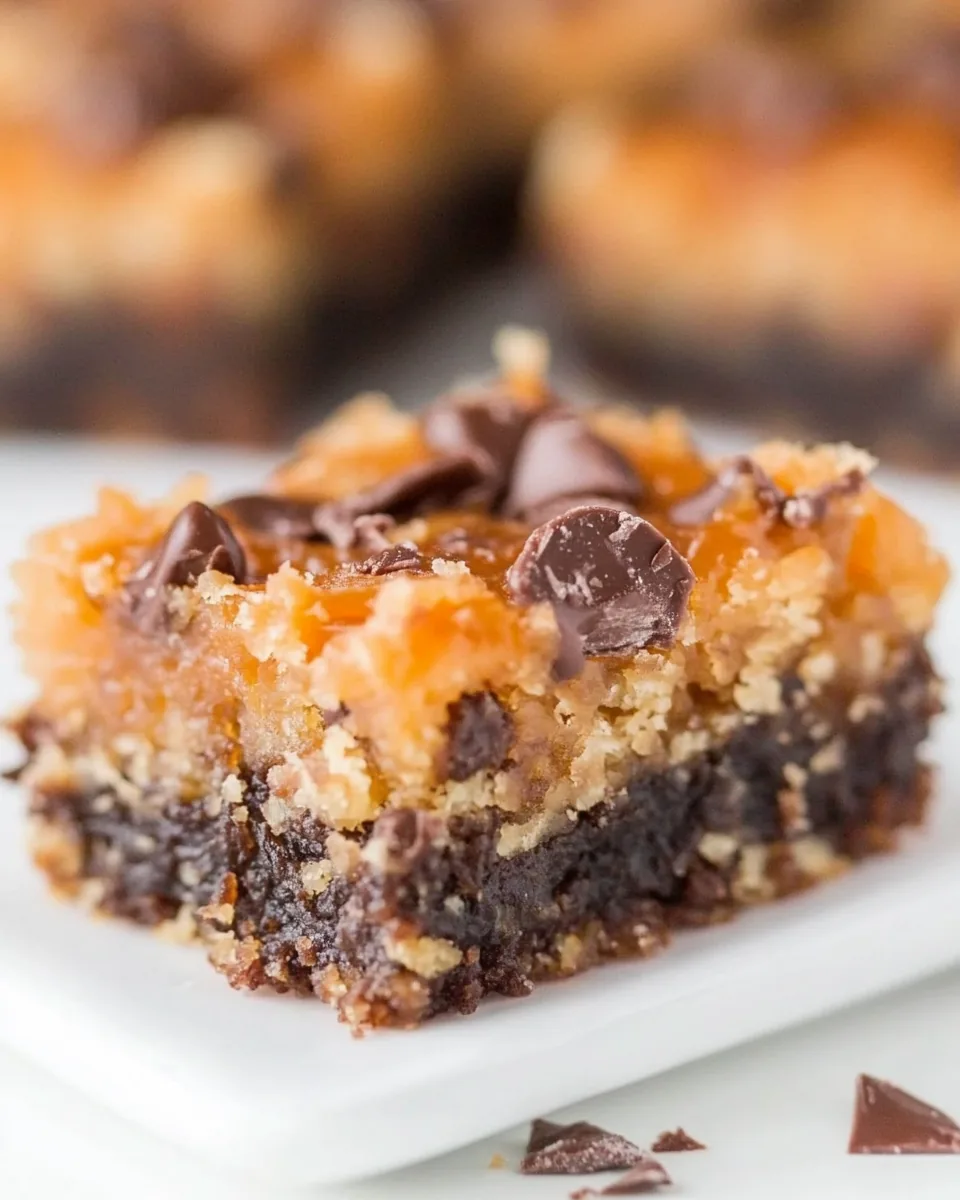
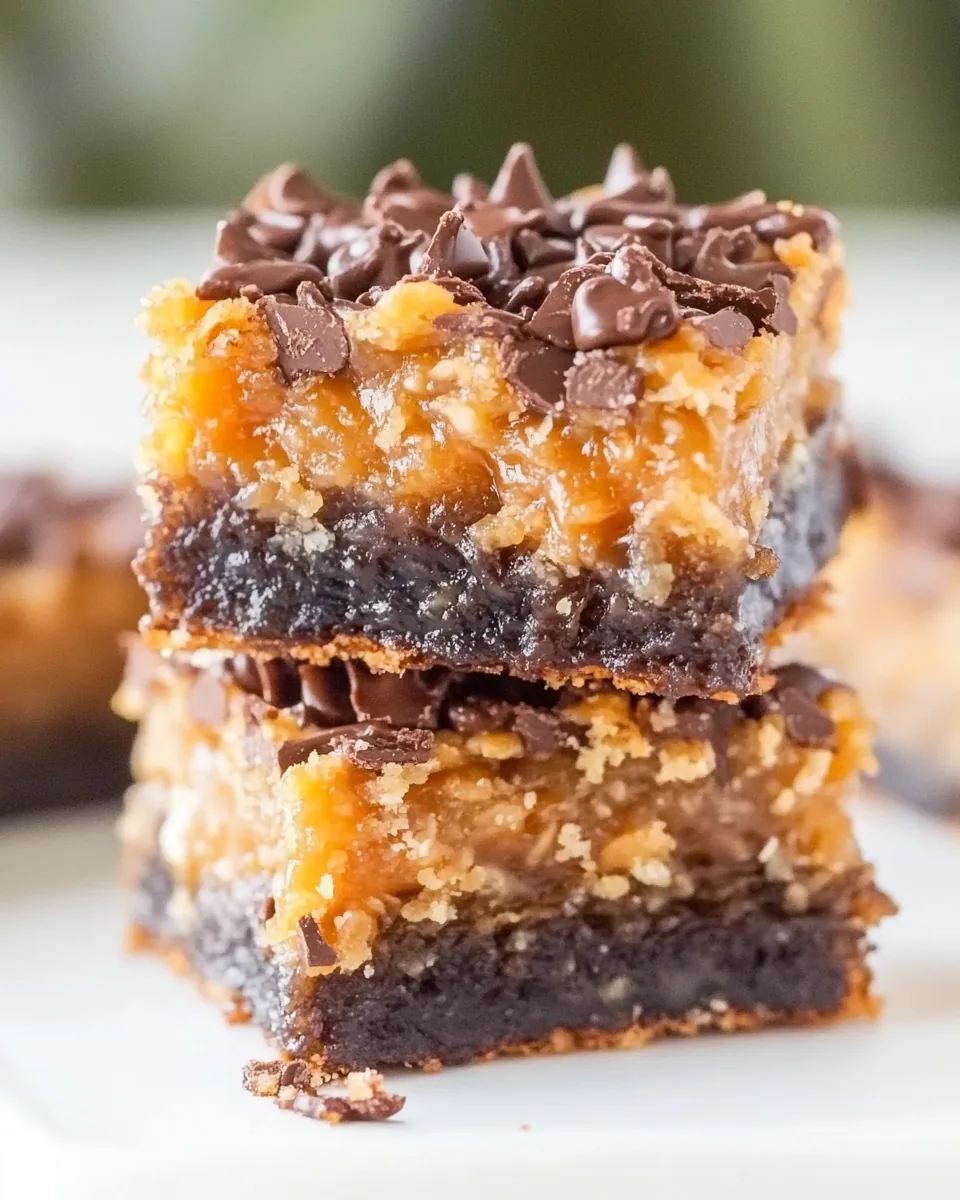
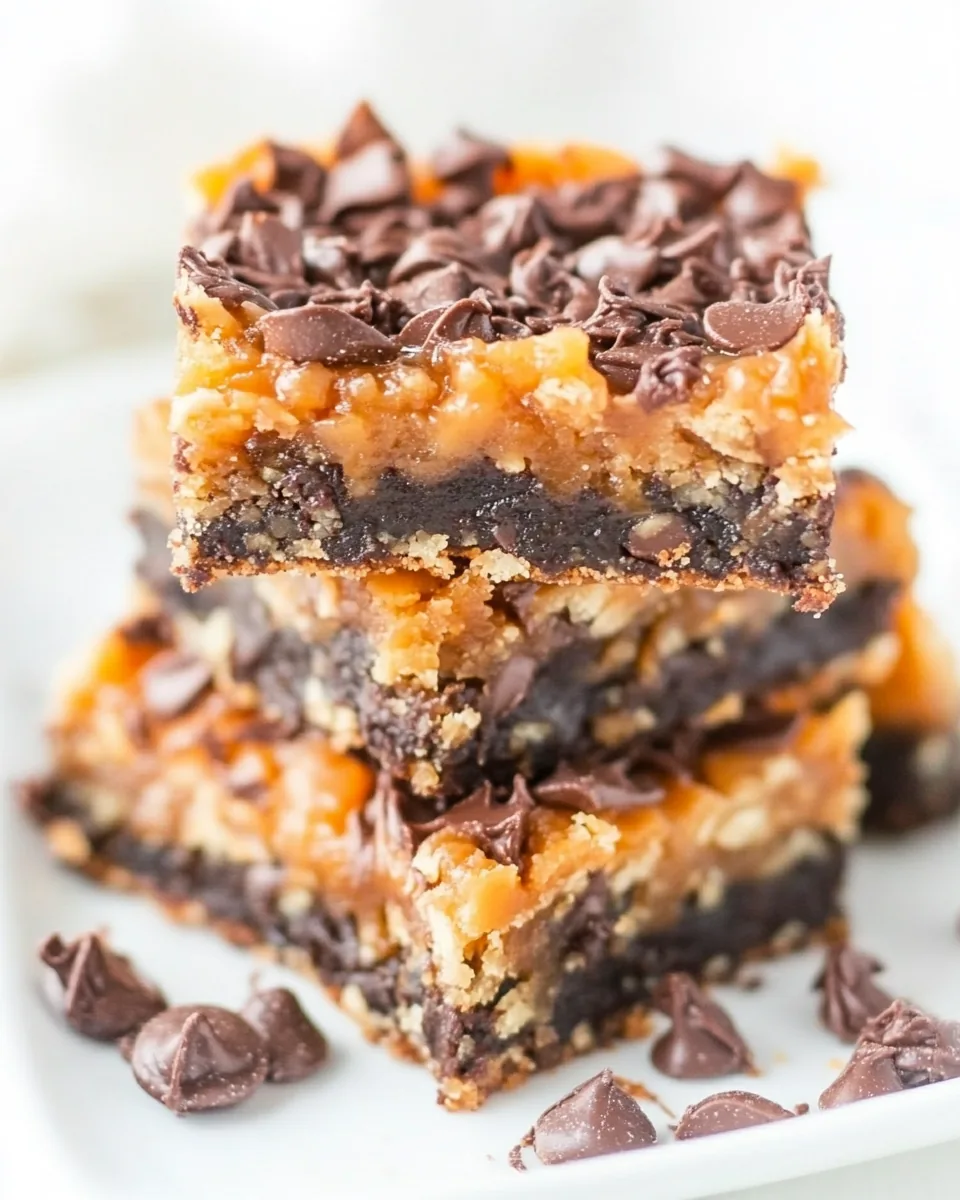
Let me tell you, these Better Than Girl Scout Samoas Cookie Bars are a crowd-pleaser! The balance of flavors here is simply divine. You’ve got the crunch of the Oreo base, the sweetness of the salted caramel, and the chewiness of the shredded coconut. Each layer offers something special, making every bite a delightful surprise. It’s that kind of dessert that makes everyone gather around the kitchen, eager to snag a piece.
Easy to Make
Don’t worry if you’re not a baking pro. The beauty of these bars lies in their simplicity. With just a few steps, you can create a dessert that looks and tastes like it came straight from a bakery. The use of Oreo cookies as the base means there’s no complicated dough-making involved. Plus, the process is straightforward enough for kids to help, making it a fun family activity!
Perfect for Any Occasion
Whether it’s a birthday party, a family reunion, or just a cozy evening at home, these bars fit right in. They’re super versatile too. You can dress them up for a special occasion or serve them casually with coffee. No matter the event, they’re bound to impress.
Store and Share
What’s even better? You can make a large batch and store them! These bars stay fresh for up to a week at room temperature, so they’re perfect for meal prep or to share with friends. You can even freeze them for later cravings. Just be sure to wrap them tightly!
Customizable Delight
If you’re feeling adventurous, this recipe can be tweaked to suit your taste. Swap out the semi-sweet chocolate chips for dark chocolate or add some nuts for a crunchy twist. The possibilities are endless, allowing you to make these bars truly your own.
Ingredients Overview for Better Than Girl Scout Samoas Cookie Bars
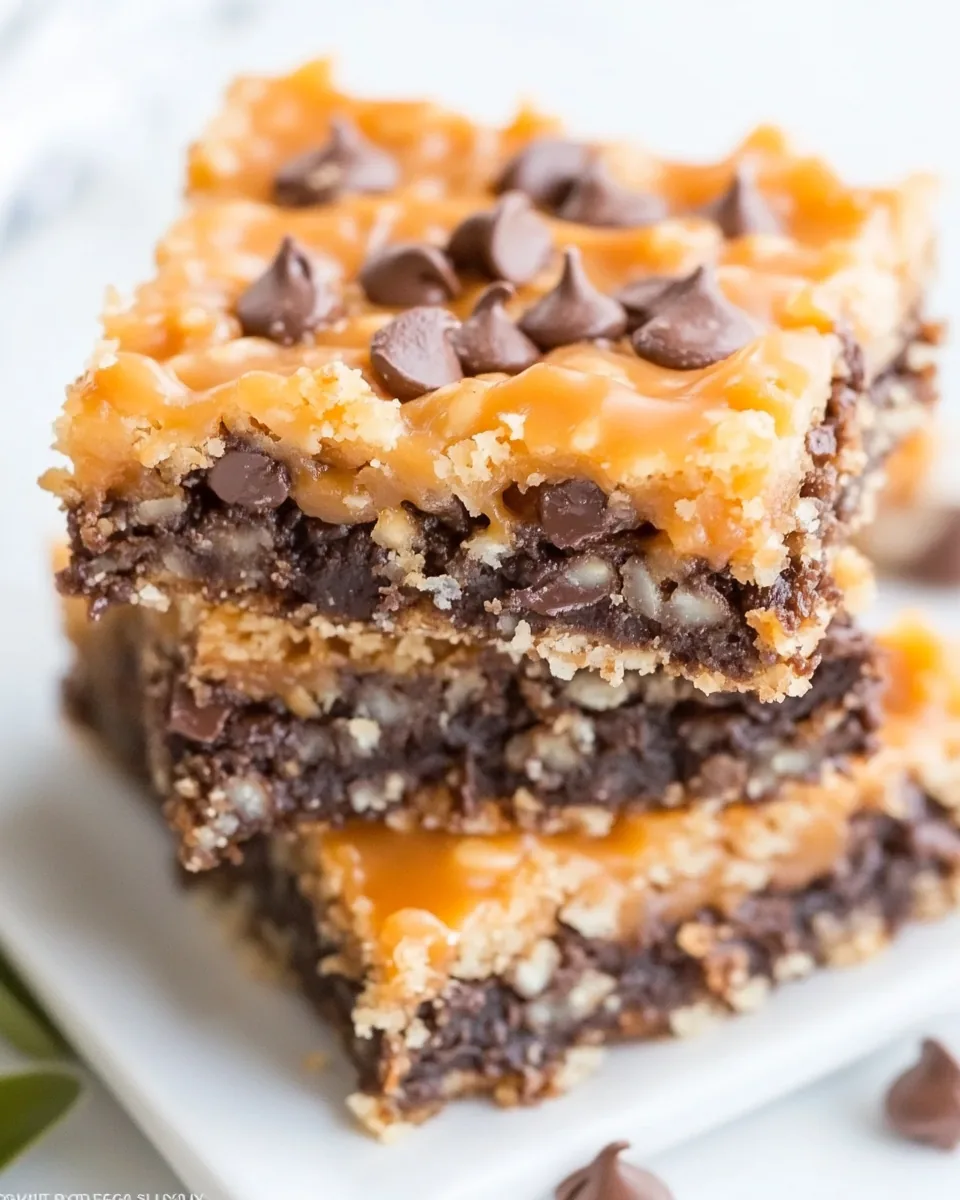
The ingredients in these bars are what truly bring the magic to life. Each component adds to the overall flavor and texture, creating a harmonious blend that delights the senses. The key players include Oreo cookies for a crunchy base, unsalted butter to hold everything together, and sweetened shredded coconut flakes that give a nod to the original Girl Scout treat. Together, these ingredients form a decadent dessert that’s sure to please.
- 12 Oreo cookies, I used regular, not Double Stuffed, crushed into fine crumbs
- ¼ cup unsalted butter, melted
- 1 cup corn flakes, lightly crushed
- 1 ¼ cups sweetened shredded coconut flakes, measured loosely and not packed
- ½ cup semi-sweet chocolate chips
- about 8 ounces salted caramel sauce (storebought or homemade)
- sea salt, optional for sprinkling
Making This Better Than Girl Scout Samoas Cookie Bars
Ready to dive into the deliciousness? Making Better Than Girl Scout Samoas Cookie Bars is a delightful experience that I can’t wait to share with you. Follow these simple yet detailed steps, and you’ll be on your way to creating these iconic bars.
- Preheat your oven to 350°F. It’s crucial to get the oven nice and hot for baking these bars. Line an 8-by-8-inch baking pan with Reynolds Wrap® Non-Stick Aluminum Foil for easy removal and cleanup. Don’t forget to spray it with cooking spray!
- In a food processor, add the Oreo cookies. Process them at high speed until they turn into fine crumbs. This is where the magic begins!
- Once crumbled, stop the machine and pour in the melted unsalted butter. Process again to mix everything well.
- Turn the crumb mixture into your prepared baking pan. Using a spatula, firmly pack the crumbs into an even flat layer. This forms the solid base of your bars.
- Next, sprinkle the corn flakes evenly over the packed Oreo base. You can crush them gently in your fist for an even distribution.
- Now, it’s time to add the sweetened shredded coconut flakes. Spread them out generously for that chewy texture.
- Sprinkle the semi-sweet chocolate chips on top, ensuring every bite has that delicious chocolate goodness.
- Finally, drizzle the salted caramel sauce evenly over everything. You want it to blend beautifully with the other ingredients.
- Place the pan in the oven and bake for about 22 to 25 minutes. You’ll know they’re done when the caramel is bubbling vigorously around the edges and in the center. It’s a sight to behold!
- Once baked, let the pan cool on a wire rack for at least one hour. I know it’s hard to wait, but trust me, it’s worth it!
- Before serving, you can sprinkle a bit of sea salt on top for that added flavor contrast. Cut into squares and enjoy!
Things Worth Knowing
- Cooling time matters: Allowing the bars to cool completely before slicing ensures cleaner cuts and better texture. It helps the chocolate and caramel set properly.
- Oven accuracy: Make sure your oven is correctly calibrated to avoid under or over-baking.
- Layering technique: Pack the crumb layer tightly to create a sturdy base, making it easier to cut and serve later.
- Storage tips: Keep your bars in an airtight container at room temperature for up to a week. This makes them perfect for meal prep or sharing.
Recipe Tips about Better Than Girl Scout Samoas Cookie Bars
When it comes to making the perfect Better Than Girl Scout Samoas Cookie Bars, there are a few tips that can elevate your baking game. Here are some valuable insights to ensure your bars come out just right!
- Storage: Bars will keep airtight at room temperature for up to one week or in the freezer for up to four months. Just make sure to wrap them tightly.
- Freezing: You can freeze these bars for later enjoyment. Just cut them into squares and store them in a freezer-safe container or bag.
- Variations: Feel free to switch up the chocolate! Use milk chocolate or dark chocolate if you prefer those flavors.
- Toppings: Consider adding nuts or extra coconut on top for added texture and flavor.
- Serving size: These bars are rich, so small squares make great servings for parties and gatherings.
Great Combinations for Better Than Girl Scout Samoas Cookie Bars
If you’re wondering how to serve up your Better Than Girl Scout Samoas Cookie Bars, there are plenty of fantastic options to consider. Here are some ideas to make your dessert experience even more enjoyable:
- Pair with coffee: A warm cup of coffee or tea complements the sweetness of the bars perfectly.
- Ice cream delight: Serve them warm with a scoop of vanilla ice cream for a decadent dessert.
- Picnic treat: Pack these bars for a picnic. They’re easy to transport and a hit with friends.
- Holiday dessert: These bars make a festive addition to any holiday dessert table, adding a sweet touch to celebrations.
- Snack time: They’re perfect for after-school snacks or as a treat for lunchboxes!
FAQ
Conclusion
The Better Than Girl Scout Samoas Cookie Bars are not just a treat; they’re a nostalgic journey back to childhood! With every bite, you’re reminded of those blissful moments of joy and celebration. I encourage you to try making these bars yourself and experience the deliciousness firsthand. They are perfect for sharing with loved ones or simply indulging in by yourself. Trust me, once you take a bite, you’ll be hooked!
Better Than Girl Scout Samoas Cookie Bars
Equipment
- Mixing Bowl
- Frying Pan
- Baking Sheet
- Food Processor
- Oven
Ingredients
- 12 cookies Oreo cookies I used regular, not Double Stuffed, crushed into fine crumbs
- ¼ cup unsalted butter melted
- 1 cup corn flakes lightly crushed
- 1 ¼ cups sweetened shredded coconut flakes measured loosely and not packed
- ½ cup semi-sweet chocolate chips
- about 8 ounces salted caramel sauce storebought or homemade
- to taste sea salt optional for sprinkling
Instructions
- Preheat your oven to 350°F. It’s crucial to get the oven nice and hot for baking these bars. Line an 8-by-8-inch baking pan with Reynolds Wrap® Non-Stick Aluminum Foil for easy removal and cleanup. Don’t forget to spray it with cooking spray!
- In a food processor, add the Oreo cookies. Process them at high speed until they turn into fine crumbs. This is where the magic begins!
- Once crumbled, stop the machine and pour in the melted unsalted butter. Process again to mix everything well.
- Turn the crumb mixture into your prepared baking pan. Using a spatula, firmly pack the crumbs into an even flat layer. This forms the solid base of your bars.
- Next, sprinkle the corn flakes evenly over the packed Oreo base. You can crush them gently in your fist for an even distribution.
- Now, it’s time to add the sweetened shredded coconut flakes. Spread them out generously for that chewy texture.
- Sprinkle the semi-sweet chocolate chips on top, ensuring every bite has that delicious chocolate goodness.
- Finally, drizzle the salted caramel sauce evenly over everything. You want it to blend beautifully with the other ingredients.
- Place the pan in the oven and bake for about 22 to 25 minutes. You’ll know they’re done when the caramel is bubbling vigorously around the edges and in the center. It’s a sight to behold!
- Once baked, let the pan cool on a wire rack for at least one hour. I know it’s hard to wait, but trust me, it’s worth it!
- Before serving, you can sprinkle a bit of sea salt on top for that added flavor contrast. Cut into squares and enjoy!
Notes
- Storage: Bars will keep airtight at room temperature for up to one week or in the freezer for up to four months. Just make sure to wrap them tightly.
- Freezing: You can freeze these bars for later enjoyment. Just cut them into squares and store them in a freezer-safe container or bag.
- Variations: Feel free to switch up the chocolate! Use milk chocolate or dark chocolate if you prefer those flavors.
- Toppings: Consider adding nuts or extra coconut on top for added texture and flavor.
- Serving size: These bars are rich, so small squares make great servings for parties and gatherings.