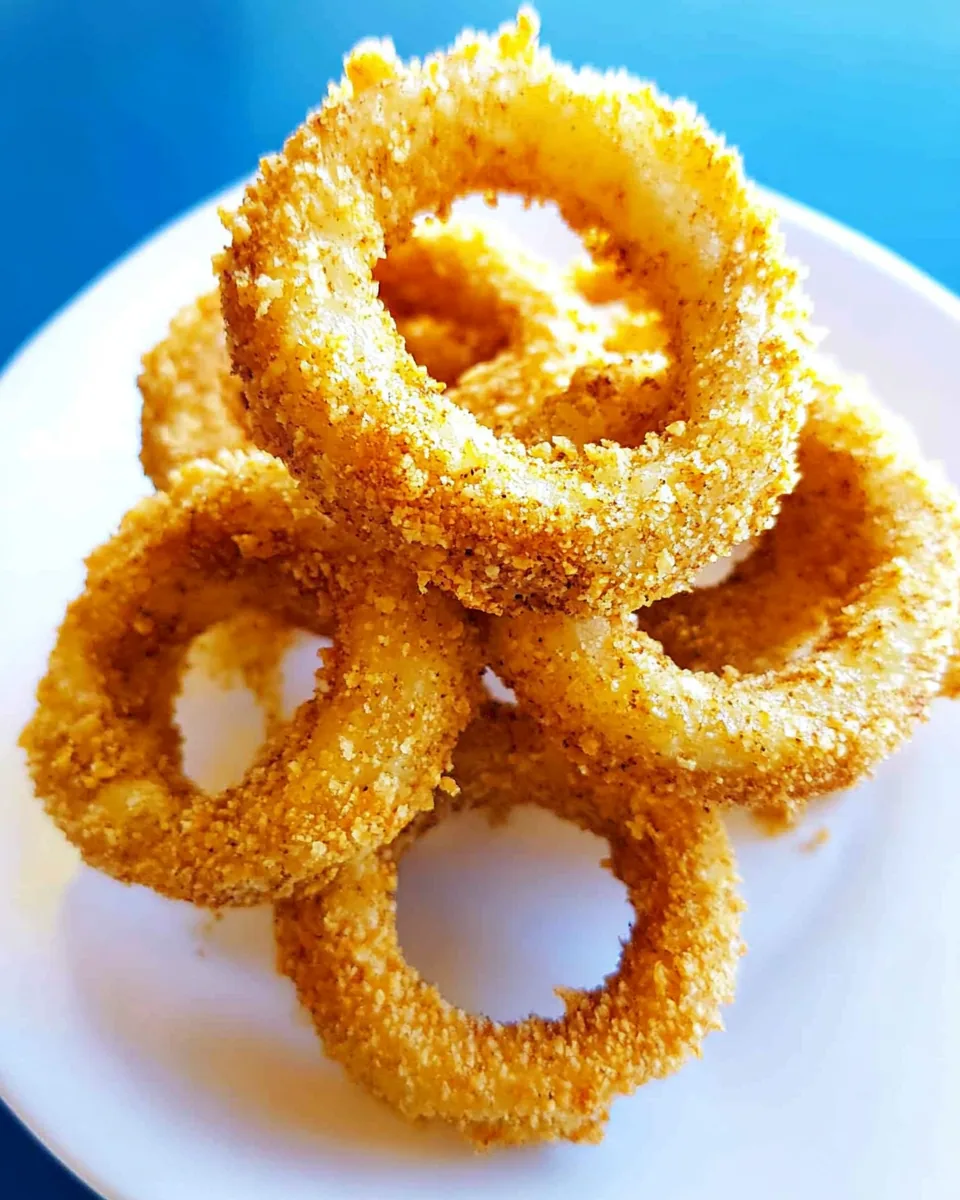
Baked Onion Rings
Growing up, I always looked forward to weekends when my family would gather around for a movie night. One of our favorite snacks was crispy, delicious Baked Onion Rings. There’s something magical about the combination of sweet, tender onions transformed into crispy, golden rings. As a kid, I loved helping in the kitchen, especially when it came to coating those onion slices in breadcrumbs. It felt like I was part of a culinary masterpiece. I remember the aromatic scent filling the house as they baked in the oven, making it impossible to resist sneaking a taste before they were served. Now, I love recreating this classic dish for my own family, sharing that joy and nostalgia with them. These oven-baked delights are perfect for movie nights, game days, or simply as a fun snack. So, join me as I take you through this easy and rewarding recipe for Baked Onion Rings!
Recipe Snapshot
40 mins
15 mins
25 mins
Medium
150 kcal
4g g
Paleo, Vegan, Gluten-Free
5g g
Wooden Spoon, Mixing Bowl, Frying Pan, Chef’s Knife, Whisk, Oven
Why This Baked Onion Rings Hits Different
1. A Healthier Alternative
Unlike traditional fried onion rings, my recipe for Baked Onion Rings allows you to enjoy all the flavor with less guilt. Baking instead of frying significantly reduces the fat content, making them a light yet satisfying snack.
2. Perfect for Any Occasion
Whether you’re hosting a party, having a family gathering, or just craving a snack, Baked Onion Rings are always a hit. They pair well with various dips, making them versatile for any event.
3. Simple Ingredients
With just a few pantry staples, you can whip up these tasty onion rings. The star, of course, is the onion, complemented by seasoned breadcrumbs and a light batter for that satisfying crunch.
4. Fun for the Kids
This recipe is an excellent opportunity to get the kids involved in cooking! They will love dipping the onion rings into the batter and coating them in breadcrumbs, making it a fun family activity.
5. Customizable Flavor
You can easily adjust the flavors to suit your taste. Add your favorite spices or use different types of breadcrumbs to create unique twists on the classic Baked Onion Rings.
6. Serve Them Hot
Nothing beats the joy of biting into a freshly baked onion ring. Serve them immediately for the best texture and flavor, and watch them disappear!
Main Ingredients for Baked Onion Rings
Creating Baked Onion Rings is all about selecting the right ingredients that work in harmony. Each component brings its charm to the dish, transforming simple onions into a delightful snack. The key players in this recipe are the fresh onion, flavorful breadcrumbs, and a light batter that creates a crispy outer layer while keeping the inside tender and sweet.
- Sweet Onion or Red Onion: A large, thinly sliced onion that becomes sweet and tender when baked.
- Gluten-Free Panko or Whole Wheat Bread Crumbs: These add crunch and texture to the onion rings, making each bite satisfying.
- Flour: Used in the batter for a light coating; you can choose gluten-free flour if needed.
- Baking Powder: Helps the batter puff up slightly, giving the onion rings a nice, airy texture.
- Black Pepper: Adds a bit of spice to balance the sweetness of the onions.
- Kosher or Sea Salt: Season to taste, enhancing all the other flavors.
- Egg White: Binds the batter, helping it to stick to the onion rings.
- Low-Fat Milk or Low-Fat Buttermilk: Creates a creamy batter that coats the onions perfectly.
How to Assemble Baked Onion Rings

Making Baked Onion Rings is a straightforward process that yields delicious results. Let’s dive into the step-by-step instructions to ensure your onion rings turn out crispy and golden every time.
Preheat your oven to 400 degrees. This initial step is crucial as a hot oven will help achieve that desired crispiness right from the start.
In a medium mixing bowl, combine the panko or whole wheat bread crumbs, flour, salt, black pepper, and baking powder. Stir them together until evenly mixed, ensuring a uniform seasoning for each ring.
-
Now, take your large, thinly sliced onions and separate them into individual rings. This is where the magic begins—each ring will soon be coated and transformed!
Add the separated onion rings to the flour mixture, gently tossing to make sure all rings are coated. Be careful not to break the rings during this process.
Once coated, remove the onions from the mixture and set them aside. This step ensures that the flour mixture is not too wet when you dip the onions later.
-
In another bowl, whisk together the low-fat milk and egg white. This batter will add a light, crispy coating to the onion rings.
Add this milk-egg mixture to the leftover flour mixture and stir to combine, ensuring the batter is smooth and ready for dipping.
Dip each onion ring into the batter, allowing any excess to drip off. Place the dipped rings on a non-stick cookie sheet. This step is essential for getting that perfect crispy texture.
-
Lightly spray or drizzle extra-virgin olive oil over the onion rings. This will help them brown beautifully in the oven.
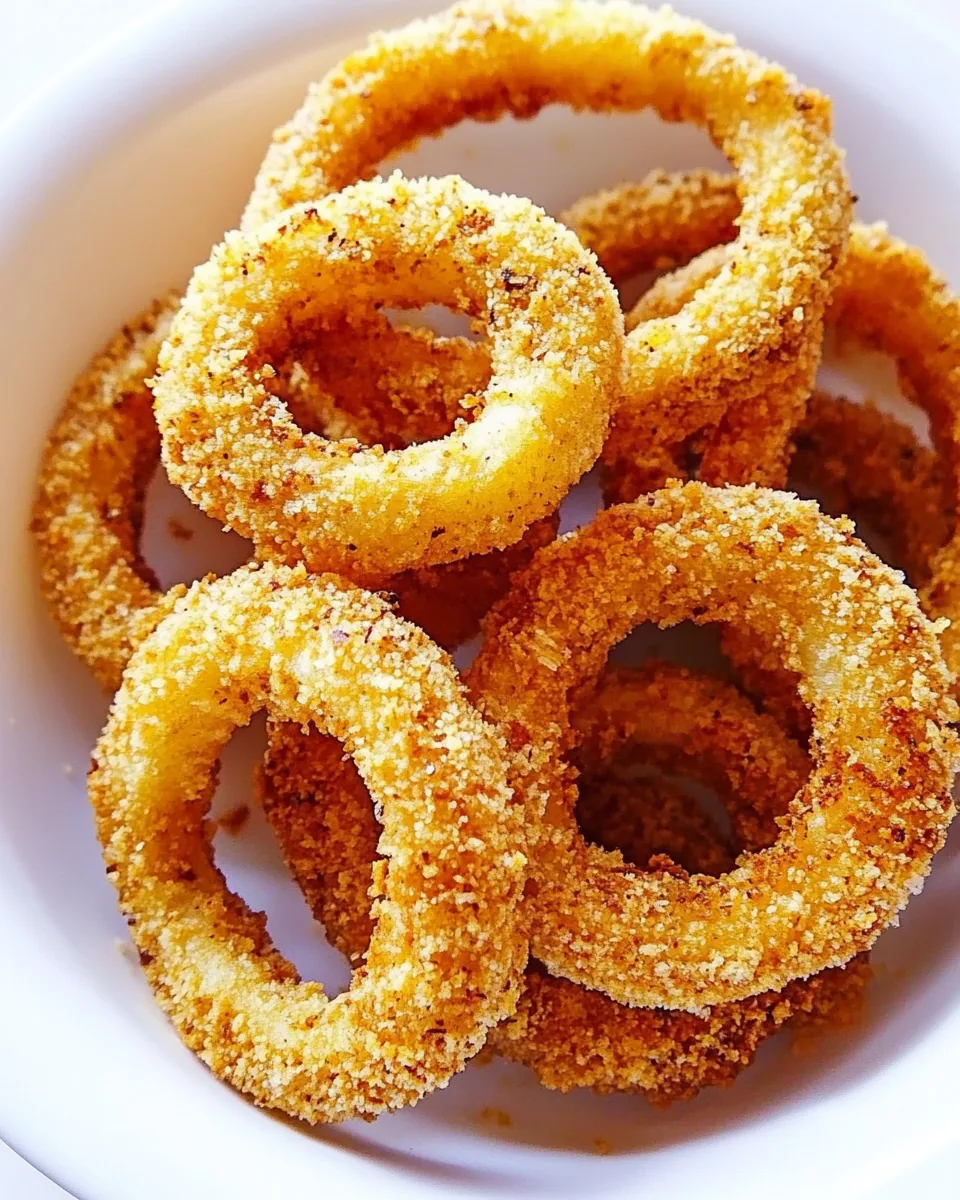
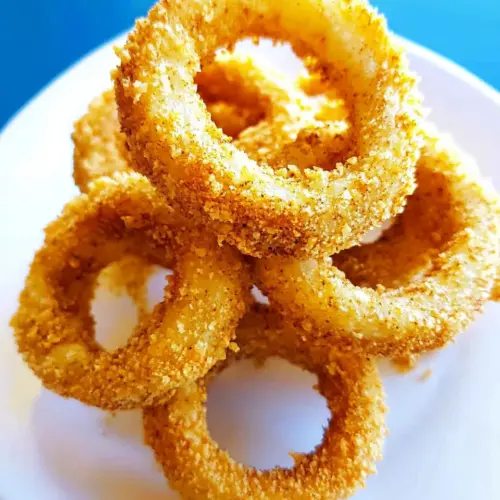
Bake the onion rings in the preheated oven. After 10 minutes, flip them to ensure even baking. Continue baking until they are golden and crispy, about 10 to 15 more minutes.
Things Worth Knowing
- Use Fresh Onions: For the best flavor, always opt for fresh onions. They should feel firm and heavy for their size.
- Don’t Skip the Tossing: Make sure to toss the onion rings in the flour mixture; this is key to achieving an even coating.
- Monitor Cooking Time: Every oven is different; keep an eye on the onion rings as they bake to prevent burning.
- Experiment with Spices: Feel free to add spices like paprika or garlic powder to the flour mixture for extra flavor.
Tips for Success

To ensure your Baked Onion Rings turn out perfectly every time, consider these helpful tips:
- Storage: Store leftover onion rings in an airtight container in the refrigerator. They are best enjoyed fresh, but can be reheated in the oven.
- Freezing: Yes, you can freeze them! Lay the baked onion rings on a baking sheet to freeze individually, then transfer to a freezer bag. Reheat directly from frozen.
- Pairing: These onion rings make a perfect side for sandwiches, burgers, or salads. They also pair well with dipping sauces like ranch or spicy ketchup.
- Customize Coating: Try using crushed cornflakes or flavored breadcrumbs for a unique twist on the classic recipe.
- Serve Immediately: For the best texture, serve the Baked Onion Rings hot out of the oven.
Best Served With
Baked Onion Rings
Baked Onion Rings are incredibly versatile and can be served alongside a variety of dishes. Here are some ideas to inspire your next meal:
- With Burgers: They make an excellent side dish to complement juicy burgers. The crunch of the rings balances the softness of the bun.
- As a Snack: Perfect for game days or movie nights, serve them with your favorite dipping sauces for an indulgent treat.
- With Salads: Toss them into salads for added texture and flavor. They elevate a simple salad into something special.
- At Parties: Serve them at gatherings as a finger food. Guests will love snacking on these crispy delights.
- For Lunch: Enjoy them as part of a hearty lunch with a side of veggies and a dip.
- Seasonal Serve: They are great for fall gatherings, pairing nicely with roasted vegetables and hearty meals.
FAQ
Conclusion
The recipe for Baked Onion Rings is truly special because it captures the essence of comfort food while being lighter and healthier than traditional versions. They are a delicious snack or side dish that everyone can enjoy. I encourage you to try making them for your next gathering or simply as a treat for yourself. You won’t be disappointed—these crispy delights are sure to bring joy to your table!
Baked Onion Rings
Equipment
- Wooden Spoon
- Mixing Bowl
- Frying Pan
- Chef's Knife
- Whisk
- Oven
Ingredients
- 1 large Sweet Onion or Red Onion, thinly sliced into rings
- 1/2 cup Gluten-Free Panko or Whole Wheat Bread Crumbs Use whole grain for a healthier option.
- 1/2 cup Flour Optional gluten-free flour.
- 1/2 teaspoon Baking Powder
- 1/4 teaspoon Black Pepper
- to taste Kosher or Sea Salt
- 1 Egg White
- 3/4 cup Low-Fat Milk or Low-Fat Buttermilk
Instructions
- Preheat your oven to 400 degrees. This initial step is crucial as a hot oven will help achieve that desired crispiness right from the start.
- In a medium mixing bowl, combine the panko or whole wheat bread crumbs, flour, salt, black pepper, and baking powder. Stir them together until evenly mixed, ensuring a uniform seasoning for each ring.
- Now, take your large, thinly sliced onions and separate them into individual rings. This is where the magic begins—each ring will soon be coated and transformed!
- Add the separated onion rings to the flour mixture, gently tossing to make sure all rings are coated. Be careful not to break the rings during this process.
- Once coated, remove the onions from the mixture and set them aside. This step ensures that the flour mixture is not too wet when you dip the onions later.
- In another bowl, whisk together the low-fat milk and egg white. This batter will add a light, crispy coating to the onion rings.
- Add this milk-egg mixture to the leftover flour mixture and stir to combine, ensuring the batter is smooth and ready for dipping.
- Dip each onion ring into the batter, allowing any excess to drip off. Place the dipped rings on a non-stick cookie sheet. This step is essential for getting that perfect crispy texture.
- Lightly spray or drizzle extra-virgin olive oil over the onion rings. This will help them brown beautifully in the oven.
- Bake the onion rings in the preheated oven. After 10 minutes, flip them to ensure even baking. Continue baking until they are golden and crispy, about 10 to 15 more minutes.
Notes
- Tip 1: If using this recipe for Green Bean Casserole, reduce cooking time by 5 minutes as the onion rings will continue to brown while on top of the casserole.