American Flag Fruit Tart
There’s something incredibly special about the American Flag Fruit Tart that takes me back to my childhood. I remember spending summer afternoons with my family, crafting colorful desserts that mirrored the vibrant hues of the American flag. This particular tart symbolizes celebration and togetherness, making it the perfect addition to any gathering. With a flaky crust and a medley of fresh fruits, the American Flag Fruit Tart is not just a dessert, but a canvas for creativity. Every bite bursts with flavor and reminds us of those sunny days spent outside, sharing stories and laughter. Whether it’s Independence Day or just a regular Tuesday, this tart brings a smile to everyone’s face.
Recipe Snapshot
60 mins
0 mins
0 mins
Medium
290 kcal
2 g
Gluten-Free, Low FODMAP
17 g
Mixing Bowl, Frying Pan, Whisk, Baking Sheet, Food Processor, Oven
The Beauty of This American Flag Fruit Tart
It’s a Showstopper
The American Flag Fruit Tart truly stands out on any table. Its vibrant display of strawberries, blueberries, and cream makes it not only delicious but also visually appealing. Guests can’t help but admire the artistry that goes into its creation.
Fresh Ingredients Matter
Using fresh fruits elevates the tart to another level. The combination of sweet strawberries and tart blueberries provides a perfect balance, and the cream adds a luscious texture that ties it all together.
Perfect for Any Occasion
Whether it’s a summer BBQ, a picnic, or a holiday celebration, this tart is versatile enough to fit any occasion. It’s a dessert that resonates with patriotism and is sure to be a crowd-pleaser, making it ideal for gatherings.
Easy to Make
Don’t be intimidated by the impressive appearance of the American Flag Fruit Tart. The steps are straightforward and manageable, even for beginner bakers. The joy of creating something so beautiful is a rewarding experience.
Customizable
While the classic red, white, and blue theme is popular, you can easily customize the tart with your favorite fruits. Feel free to experiment with seasonal produce to keep things fresh and exciting.
A Sweet Memory Maker
Every time you prepare the American Flag Fruit Tart, it’s an opportunity to create memories. Involve your family or friends in the process, making it a shared experience filled with joy and laughter.
What You Need for American Flag Fruit Tart
The ingredients for the American Flag Fruit Tart are simple yet essential. Each component plays a crucial role in creating the perfect balance of flavors and textures. The key players here include the flaky crust, which serves as the foundation, and the fresh fruits that provide vibrant color and taste.
- 1 ½ cups all-purpose flour – The base for our tart crust, providing structure and stability.
- ½ cup powdered sugar – Adds sweetness to the crust and gives it a tender texture.
- ¼ teaspoon salt – Enhances the flavors and balances the sweetness of the tart.
- 9 tablespoons unsalted butter – Provides richness and a flaky texture to the crust.
- 1 large egg yolk – Binds the ingredients together and adds moisture for a perfect crust.
How to Assemble American Flag Fruit Tart
Creating the American Flag Fruit Tart is a delightful process. Each step brings you closer to a beautifully finished dessert. Follow these detailed steps to ensure a stunning tart.
To make the crust, put the flour, powdered sugar, and salt in a food processor and pulse to combine. This method helps to blend the dry ingredients evenly, creating the perfect foundation for your tart.
Add the butter and pulse until the mixture resembles cornmeal with some pea-sized chunks. This step is crucial for achieving that desired flaky texture.
-
Whisk the egg yolk, and add it a little at a time, pulsing after each addition. Continue pulsing with long 10-second pulses until the mixture comes together. You’ll know it’s ready when it forms a cohesive dough.
Turn the dough out onto a lightly floured work surface and gently knead until any extra flour is incorporated. Be careful not to over-knead, as this can lead to a tough crust.
Press the dough into an 11-inch greased tart pan with a removable bottom. Press the dough evenly over the bottom and up the sides of the pan. Freeze the crust for at least 30 minutes—this helps maintain its shape during baking.
-
Preheat the oven to 375 degrees. This ensures your crust gets the right amount of heat for a golden finish.
Top with a piece of non-stick foil or buttered foil and press it onto the surface. This prevents the crust from puffing up while it bakes.
Place the tart pan on a baking sheet and bake for 25 minutes or until the crust is golden brown. Keep an eye on it towards the end to prevent burning.
-
Remove to a wire rack to cool completely. It’s important to let it cool so that the filling doesn’t melt or become runny.
When the crust is cooled, make the filling by placing all the filling ingredients in a bowl and beat until the mixture is smooth. This will create a lovely creamy texture to complement the fruits.
Scrape into the tart shell and smooth the top with an offset spatula. Take your time to make it look beautiful.
-
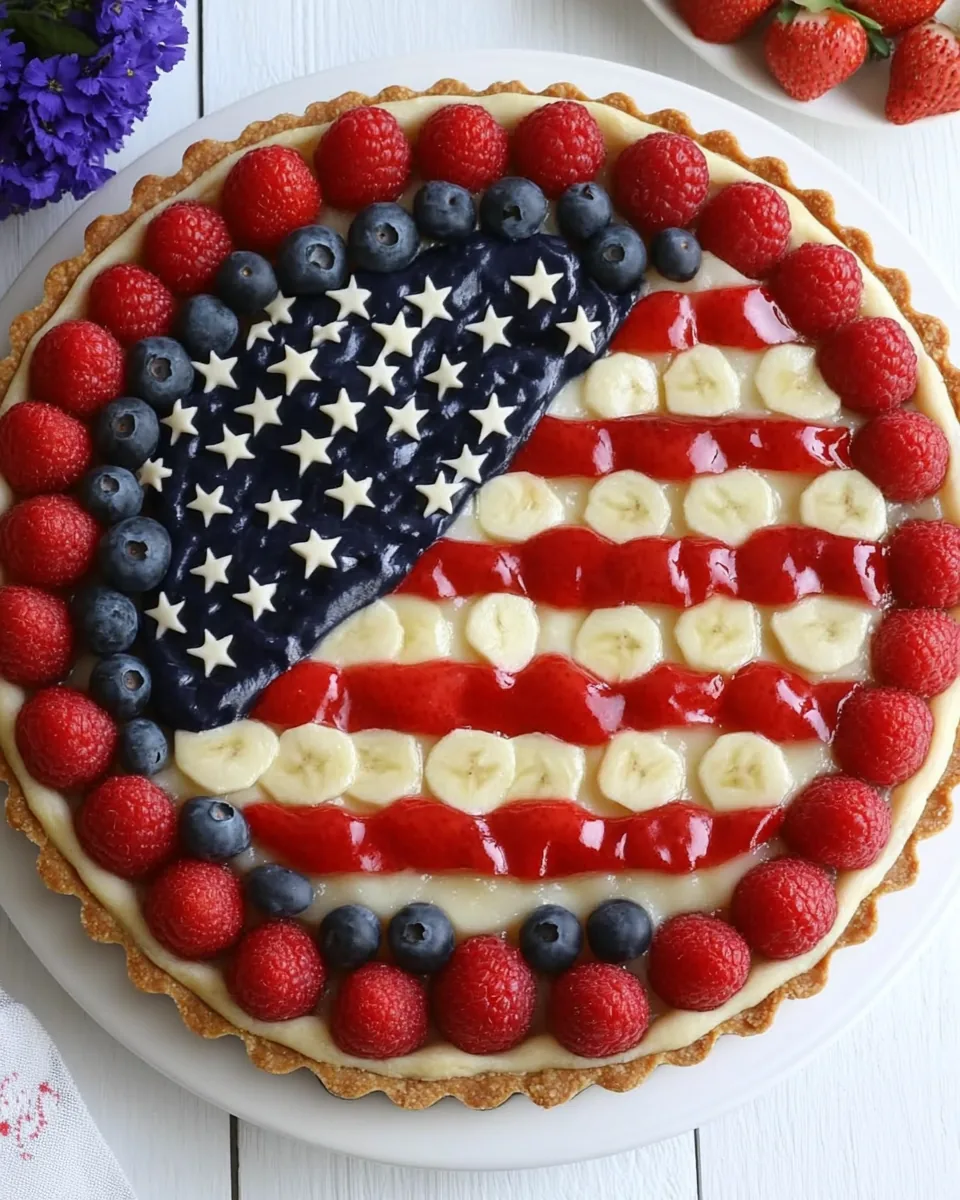
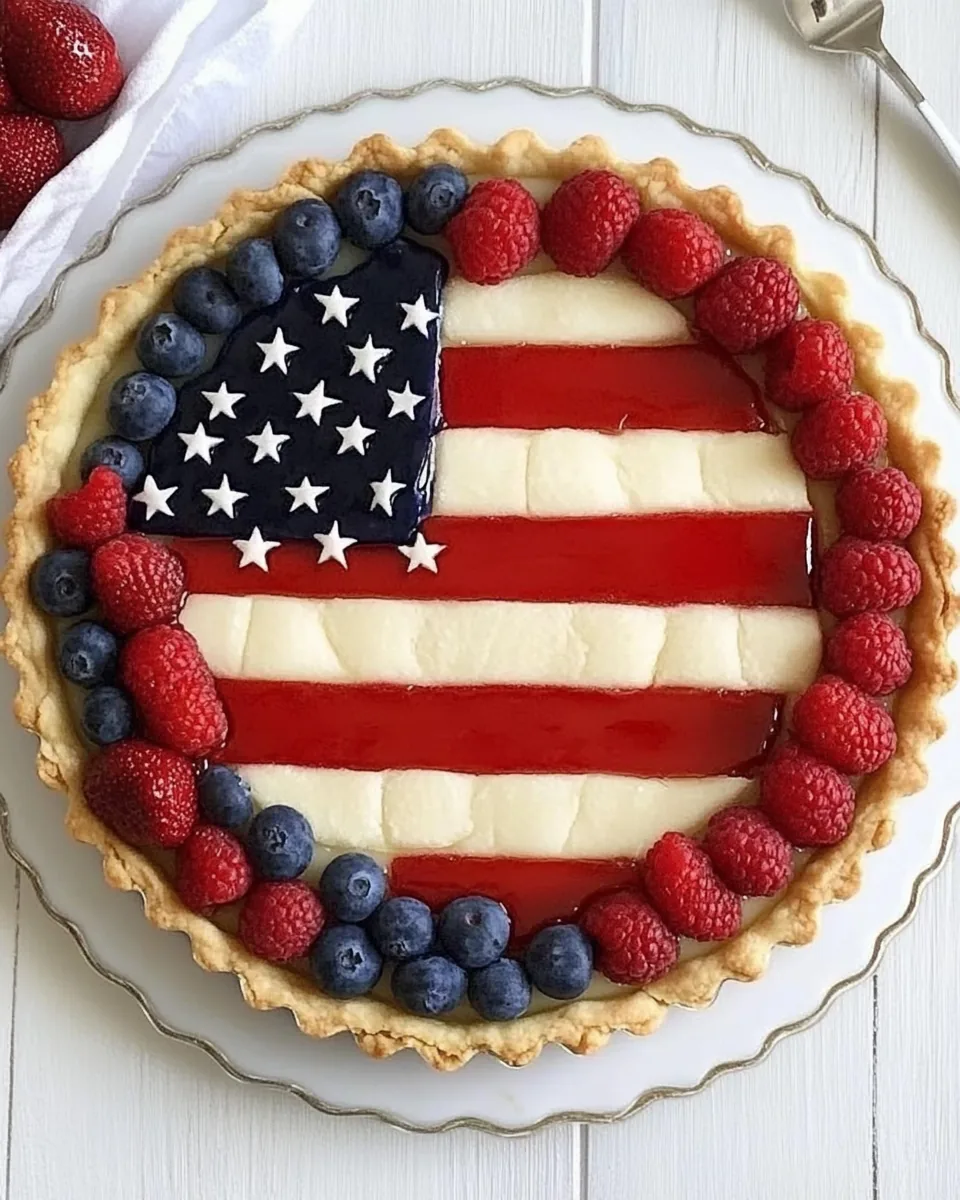
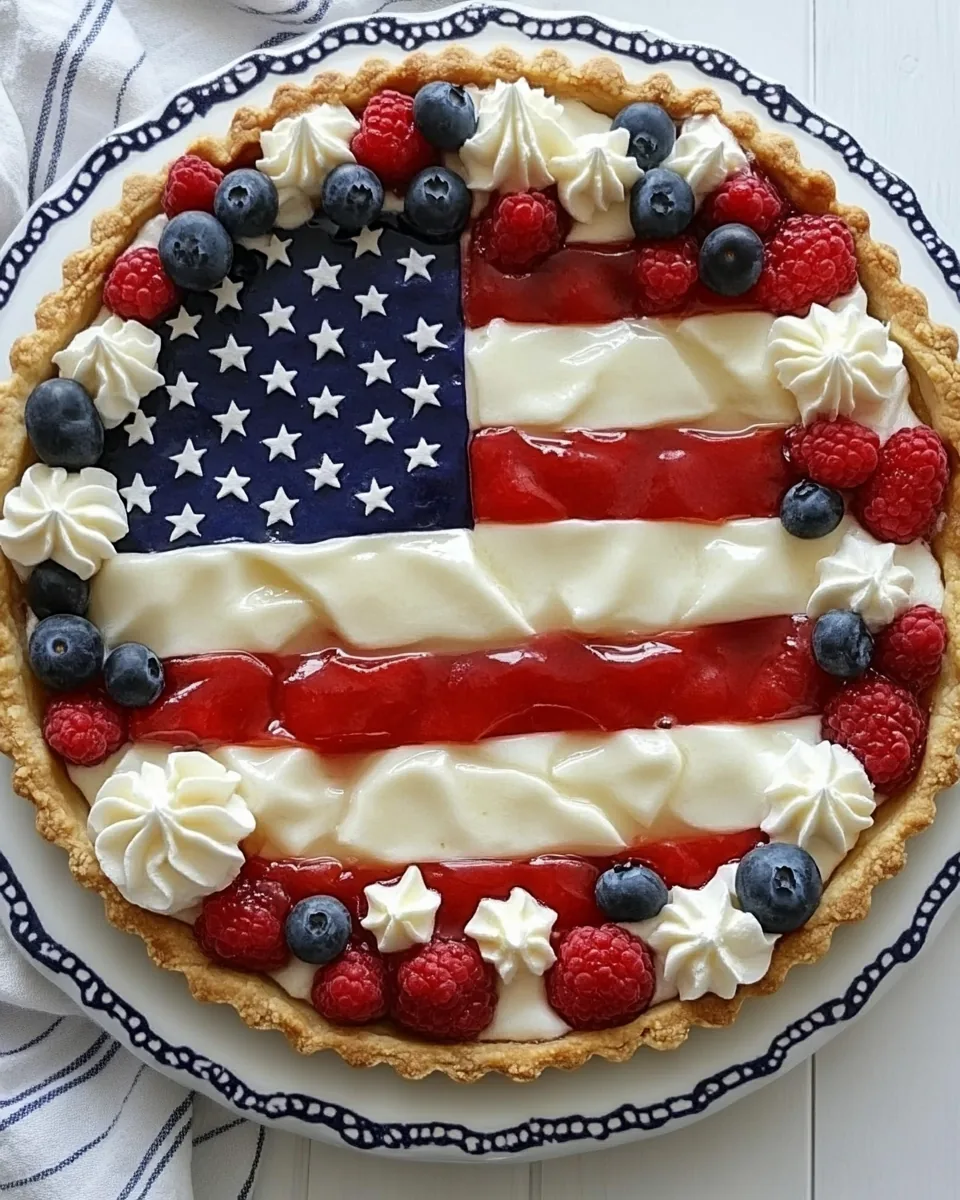
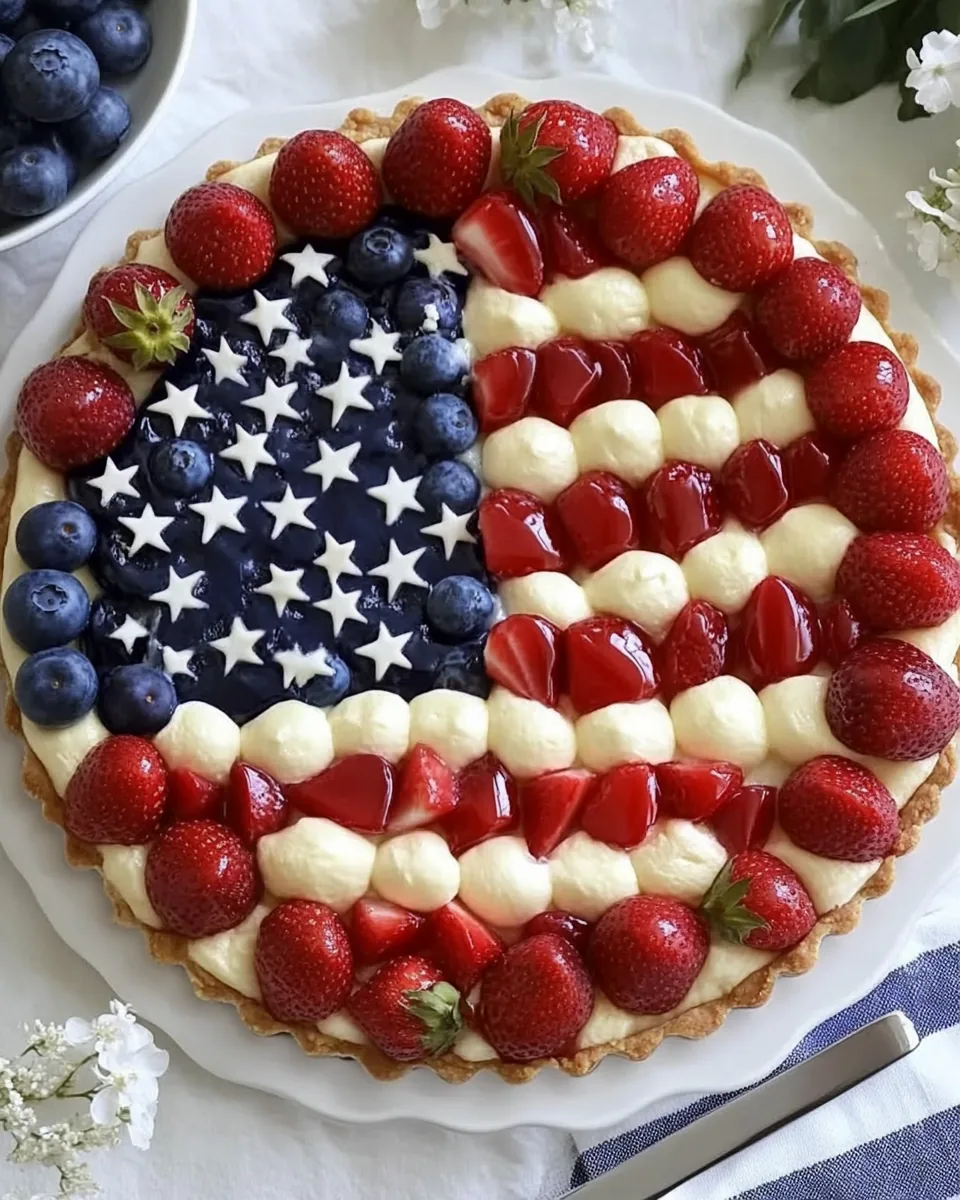
To decorate, select the biggest blueberries and cut strawberries in half, removing the stems and hulls. Set aside. The arrangement will create that flag effect.
Whip cream with powdered sugar and pipe some rows of cream across the surface, leaving enough space between the cream for rows of strawberries. Leave one corner free of whipped cream for the blueberries.
Add strawberry halves, cut side down, in rows, then fill the open area with rows of blueberries. This step is where the magic happens; it transforms your tart into a patriotic masterpiece.
-
Keep chilled until you serve. This allows the flavors to meld and the tart to set properly, ensuring each slice is perfect.
Things Worth Knowing
- Temperature Matters: Ensure your ingredients, especially the butter, are very cold to achieve a flaky crust.
- Don’t Overwork the Dough: Gentle handling is key to keeping your crust tender. Over-kneading can lead to tough texture.
- Chill Your Crust: Freezing the crust before baking is essential for maintaining its shape and texture during baking.
- Fruit Selection: Choose fresh, ripe fruits for the best flavor and make sure to wash them thoroughly before use.
Helpful Notes about American Flag Fruit Tart
Making the American Flag Fruit Tart is a delightful adventure. Here are some helpful tips to ensure your tart turns out perfectly.
- Storage: Keep the tart refrigerated to maintain freshness. It’s best enjoyed within 2 to 3 days.
- Freezing: While the assembled tart doesn’t freeze well, you can freeze the crust. Just thaw it before adding the filling and fruit.
- Pairing: Serve with a scoop of vanilla ice cream or a side of whipped cream for an extra treat.
- Presentation: For an impressive look, use a piping bag to create decorative patterns with the cream.
- Variations: Feel free to experiment with other fruits like kiwi or raspberries to create different color schemes.
- Event Planning: This tart is perfect for summer picnics, birthday parties, or patriotic holidays!
What to Serve With American Flag Fruit Tart
Pairing the American Flag Fruit Tart with complementary dishes can elevate your dining experience. Here are some suggestions to consider:
- Grilled Chicken Salad: A light, fresh salad will balance the sweetness of the tart, creating a perfect meal.
- Ice Cream: Vanilla or lemon sorbet can enhance the fruity flavors of the tart and offer a refreshing contrast.
- Cheese Platter: An assortment of cheeses, including brie and goat cheese, can provide a savory counterpart to the sweet dessert.
- Summer Beverages: Serve with lemonade or iced tea to keep things light and refreshing during warm weather gatherings.
- Picnic Friendly: This tart is ideal for outdoor events. It travels well and can be made ahead of time, allowing you to enjoy more time with guests.
- Celebratory Occasions: Perfect for Fourth of July barbecues or family reunions, the tart adds a festive touch to any gathering.
FAQ
Conclusion
The American Flag Fruit Tart is not just a dessert; it’s a celebration of flavors and colors that brings joy to any gathering. Its beautiful presentation and delicious taste make it a standout choice for summer festivities or any special occasion. I encourage you to try this tart and create your own joyful memories around it. Happy baking!

American Flag Fruit Tart
Equipment
- Mixing Bowl
- Frying Pan
- Whisk
- Baking Sheet
- Food Processor
- Oven
Ingredients
- 1 ½ cups All-Purpose Flour
- ½ cup Powdered Sugar
- ¼ teaspoon Salt
- 9 tablespoons Unsalted Butter
- 1 large Egg Yolk
Instructions
- To make the crust, put the flour, powdered sugar, and salt in a food processor and pulse to combine.
- Add the butter and pulse until the mixture resembles cornmeal with some pea-sized chunks.
- Whisk the egg yolk, and add it a little at a time, pulsing after each addition.
- Turn the dough out onto a lightly floured work surface and gently knead until any extra flour is incorporated.
- Press the dough into an 11-inch greased tart pan with a removable bottom. Freeze the crust for at least 30 minutes.
- Preheat the oven to 375 degrees.
- Top with a piece of non-stick foil or buttered foil and press it onto the surface.
- Place the tart pan on a baking sheet and bake for 25 minutes or until the crust is golden brown.
- Remove to a wire rack to cool completely.
- When the crust is cooled, make the filling by placing all the filling ingredients in a bowl and beat until the mixture is smooth.
- Scrape into the tart shell and smooth the top with an offset spatula.
- To decorate, select the biggest blueberries and cut strawberries in half, removing the stems and hulls.
- Whip cream with powdered sugar and pipe some rows of cream across the surface, leaving enough space between the cream for rows of strawberries.
- Add strawberry halves, cut side down, in rows, then fill the open area with rows of blueberries.
- Keep chilled until you serve.
Notes
- Tip 1: Keep the tart refrigerated to maintain freshness. It’s best enjoyed within 2 to 3 days.
- Tip 2: While the assembled tart doesn’t freeze well, you can freeze the crust. Just thaw it before adding the filling and fruit.
- Tip 3: Serve with vanilla ice cream or a side of whipped cream for an extra treat.
- Tip 4: For an impressive look, use a piping bag to create decorative patterns with the cream.
- Tip 5: Feel free to experiment with other fruits like kiwi or raspberries.