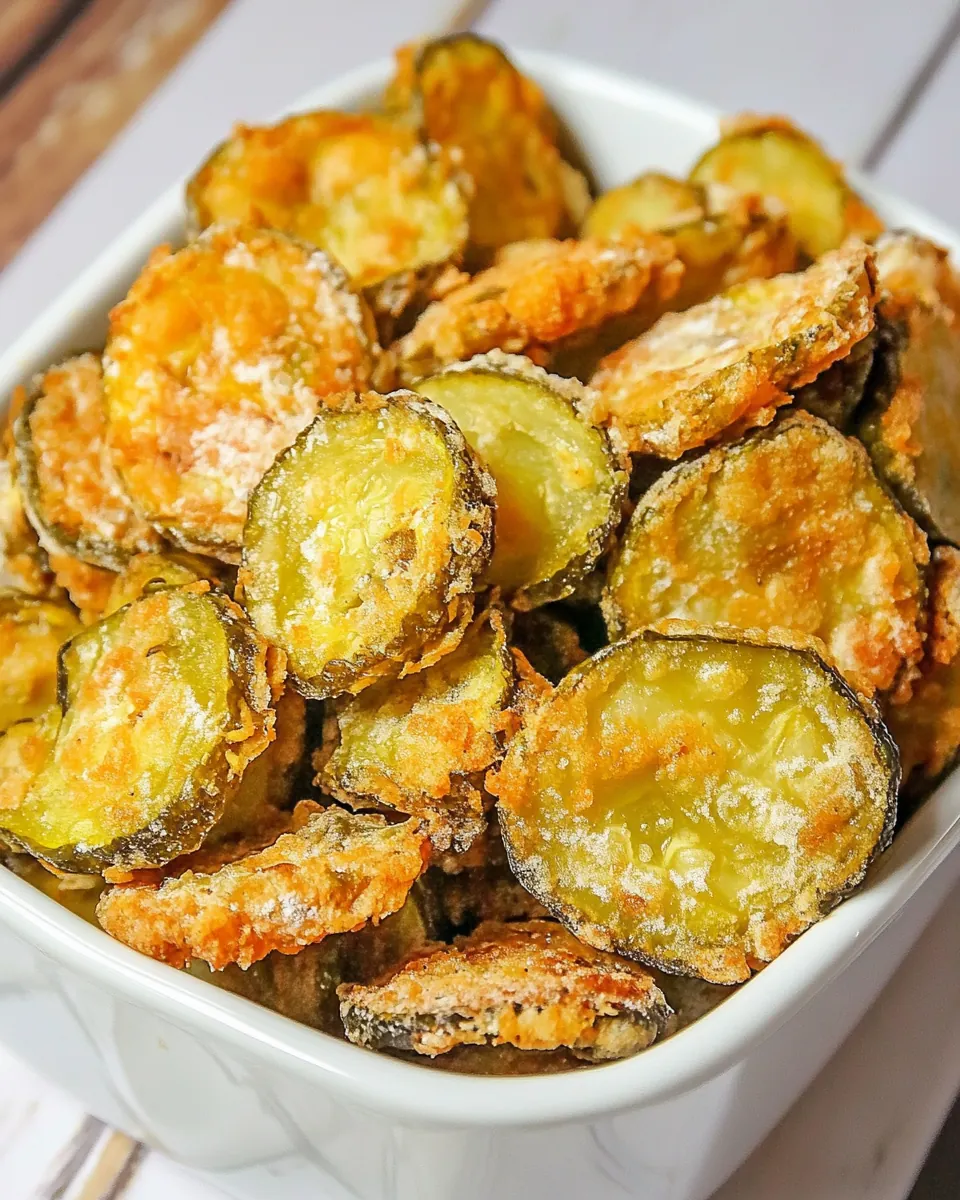
Air Fryer Fried Pickles
Air Fryer Fried Pickles started as a late night craving that turned my tiny kitchen into a crunchy laboratory. I remember coming home after a long shift, rummaging through the fridge, and finding a jar of dill picks that were crying out for one last hurrah. I wanted something quick and bold, something that would snap and fizz with flavor without dragging me through a long cleanup. That first batch, made with a simple flour and spice mix, popped into the air fryer and transformed into little golden coins that made me grin like a kid.
Over time I refined the coating, adjusted the spices, and learned how to coax maximum crispness from a single layer in the air fryer basket. Now, whenever friends drop by, I love serving a basket of these, watching them reach in and declare them addictive. The trick is in the blotting, the seasoned flour, and a light touch of olive oil so each piece crisps rather than steams. I still tell the same story, yet every batch tastes a bit different because cooking is part memory and part experimentation.
Recipe Snapshot
30 mins
10 mins
20 mins
Easy
250 kcal
American
Paleo, Vegan
Appetizers
Air Fryer, Paper Towels, Medium Bowl
What Sets This Air Fryer Fried Pickles Apart
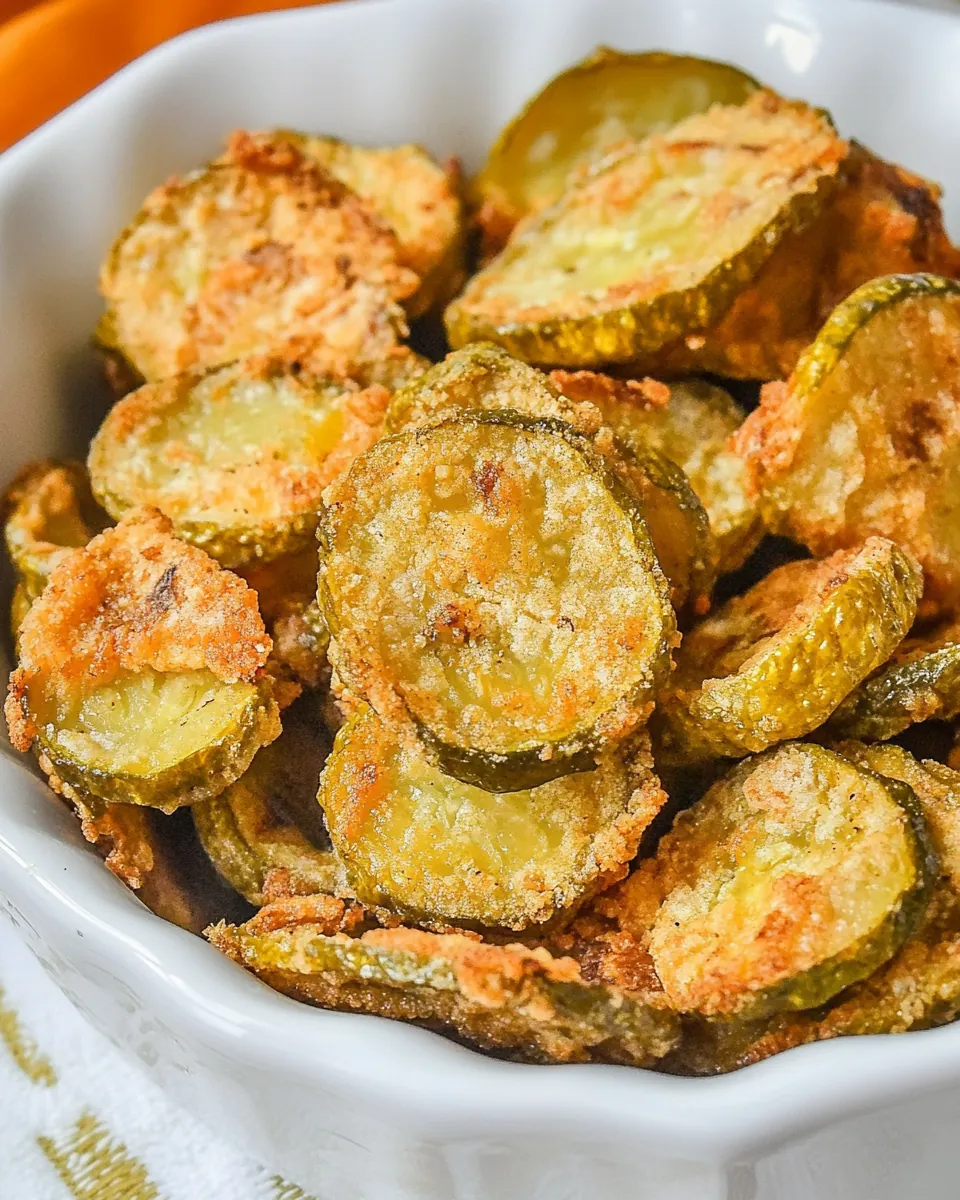
Crunch without the guilt
I love that Air Fryer Fried Pickles deliver that craveable crunch while using far less oil than deep frying. When I want the same satisfying texture but without a greasy aftermath, this method gives it to me. The air fryer circulates hot air so the coating goes crisp and the interior stays tangy, not soggy.
Speedy and snackable
We often need snacks fast, and these pickles come together in minutes. From drying the slices to arranging them in a single layer, the process is efficient. I appreciate recipes that respect time without sacrificing flavor, and these do just that.
Customizable spice profile
You can make the coating mild or punchy by tweaking the spices. I personally like the smoky paprika and Cajun spice working together to highlight the briny brightness of the pickles. Each tweak alters the vibe, so you can tailor a batch for weeknight comfort or party-ready boldness.
Perfect for sharing
These are great for gatherings because they’re finger friendly and pair with many dips. I always make a big batch in shifts, keeping finished pieces warm while the next round cooks. Guests love the interactive element, and it’s fun to see everyone pick their favorites.
Minimal equipment, maximum payoff
All you need is an air fryer and a few pantry staples. That simplicity makes the recipe approachable for cooks at any level. I find that the fewer moving parts, the more likely I am to make them often.
Ingredients for Air Fryer Fried Pickles
These ingredients are intentionally straightforward, each playing a clear role. The pickles bring acidity and moisture, the all purpose flour forms a basic coating that takes flavor well, and the spice blend layers in smoky, garlicky, and Cajun heat. A touch of Olive oil helps crisp the surface without drowning the slices. Together they balance tang, texture, and aroma.
- 2 cups sliced dill pickles: Provide a crisp, tangy base and deliver the characteristic briny crunch that defines fried pickle snacks; sliced dill pickles contribute moisture that helps batter adhere and adds a bright contrast to fried seasonings. Patting them dry before coating reduces excess liquid so oil now crisps the exterior instead of steaming it, yielding a crunchy bite. Choose firm slices to maintain texture through the air fryer cycle.
- 1 cup all-purpose flour: Create a dry coating and binding layer that turns into a golden, crispy crust when air fried; all-purpose flour adds structure and lightness to the breading mix. Use even dredging to ensure each pickle slice receives consistent coverage for uniform browning. Adjust flour amount slightly if coating seems too thin or too thick to maintain texture balance.
- 1 tablespoon garlic powder: Deliver savory depth and a mild aromatic garlic note that complements the pickles' acidity; garlic powder disperses evenly through the flour for balanced flavor. Incorporate it into the dry mix so each piece picks up subtle pungency without fresh garlic's moisture. Use measured amounts to avoid overpowering the other spices.
- 1 tablespoon onion powder: Contribute a sweet, mellow onion flavor and help round out the spice blend; onion powder offers background savory tones that enhance overall seasoning. Mixing it into the flour ensures consistent distribution so every slice tastes uniform. Opt for finely ground powder to avoid gritty texture in the coating.
- 1 teaspoon smoked paprika: Add a warm, smoky complexity and a subtle color boost to the breading; smoked paprika brings depth without adding heat. Sprinkle it into the dry mix to balance the tang of the pickles and the sharpness of other spices. Use smoked paprika for a nuanced roasted flavor profile.
- 1 tablespoon Cajun spice: Provide bold, zesty seasoning with regional spice complexity that elevates the overall flavor; Cajun spice introduces savory, peppery, and aromatic elements to the crust. Blend it thoroughly with the flour so the coating has consistent seasoning and a pronounced savory kick. Adjust quantity to control the mixture's intensity.
- 1/8 teaspoon cayenne pepper: Introduce sharp heat to brighten the seasoning blend and add a light, lingering spice on the finish; cayenne pepper increases warmth without altering texture. Use sparingly when combined with Cajun spice to achieve balanced heat that complements the tangy pickles. Measure carefully to avoid overwhelming other flavors.
- Olive oil: Help promote even browning and create a crisp outer texture when applied lightly; olive oil assists in conducting heat across the coating during air frying. Toss or brush coated pickles with a small amount to encourage golden color while maintaining a lighter fry compared to deep frying. Choose a neutral or mild-flavored olive oil to avoid imparting strong fruity notes.
Cooking Method for Air Fryer Fried Pickles
I like to tackle this recipe with calm focus, arranging everything so I can move smoothly from blotting to coating to air frying. The steps below expand on each action so you can sense when things are right and fix common hiccups. Keep an eye on texture and aroma as you work.
- Preheat air fryer to 400 degrees F.: Warm, hot air is essential for rapid surface browning that produces crunch while keeping the interior tangy. You should smell a faint toasty hum from the unit as it reaches temperature, which tells you the circulation is ready. If you skip preheating, the coating may absorb oil and cook unevenly, resulting in a limp finish. A common mistake is overcrowding the basket before it reaches the target heat, which reduces crisping power.
- Drain sliced pickles on paper towels.: After blotting, the surface should feel slightly tacky but not wet, and you may see tiny beads of brine. Drying prevents steam from building under the coating, which would make the crust soggy. The why here is simple, moisture is the enemy of crispness. People often underestimate how much water comes from jarred pickles , so be patient and press gently to remove excess liquid.
- In a medium bowl, mix together flour and spices.: As you whisk, the aroma of garlic, onion, and smoked paprika will bloom, signaling an even distribution. This dry blend ensures each slice gets balanced seasoning without pockets of spice. If you rush this step, you may end up with clumps of seasoning that burn in the air fryer and create bitter spots. Sifting or stirring thoroughly prevents uneven flavor and texture.
- Coat sliced pickles with the flour mixture and arrange them in a single layer in the air fryer. Work in batches if needed.: When the flour clings evenly, the slices will look matte rather than patchy. Lay them with space around each piece so hot air circulates freely and the surfaces crisp uniformly. Crowding traps steam and yields soft centers, which is the most common error at this stage. If you notice flour falling off, gently press the coating so it adheres better before cooking.
- Spray with a cooking spray or drizzle with a bit of olive oil.: Lightly misting or drizzling adds the fat needed for browning, and you should see a faint sheen on the coating. The oil helps Maillard reactions create golden color and that irresistible crunch. Applying too much will make the pieces greasy rather than crisp, so use a measured touch. If you only have a bottle, use a spoon to distribute small amounts and spread it thinly with your fingers or tongs.
- Cook for 10 minutes then flip them over and cook for an additional 5 minutes.: In the first cook, you will hear a soft crisping sound, and the edges will start to turn golden. After flipping, the other side should mirror that color and the aroma will shift toward toasted spices and browned starch. This two stage approach gives even color on both sides while preventing burning. A common pitfall is leaving the basket closed without checking, which can allow some pieces to go from golden to overly dark quickly. If any pieces seem to brown fast, reduce the final cook time by a minute or two and check more frequently.
Pro Tips and Tweaks

I like to keep a handful of pro tricks on hand so each batch of Air Fryer Fried Pickles turns out crisp and perfectly seasoned. These tips cover timing, technique, and small swaps that yield big improvements. Try one or two of them the next time you make a batch.
- Pat dry before coating: Ensure the pickles are well dried so the flour clings instead of turning pasty.
- Work in small batches: Overcrowding reduces airflow and produces soggy results, so cook in shifts for even crispness.
- Use a light spray of oil: A thin mist or a teaspoon spread evenly browns the coating without making it greasy.
- Press coating gently: After dredging, press the flour mix onto the slices to improve adhesion and reduce flaking during cooking.
- Watch the final minutes: The difference between golden and burned can be just a minute, so check often toward the end of the cook time.
- Try adding cornstarch: Mixing a little cornstarch with the flour helps create an extra-crispy crust as noted in the recipe notes.
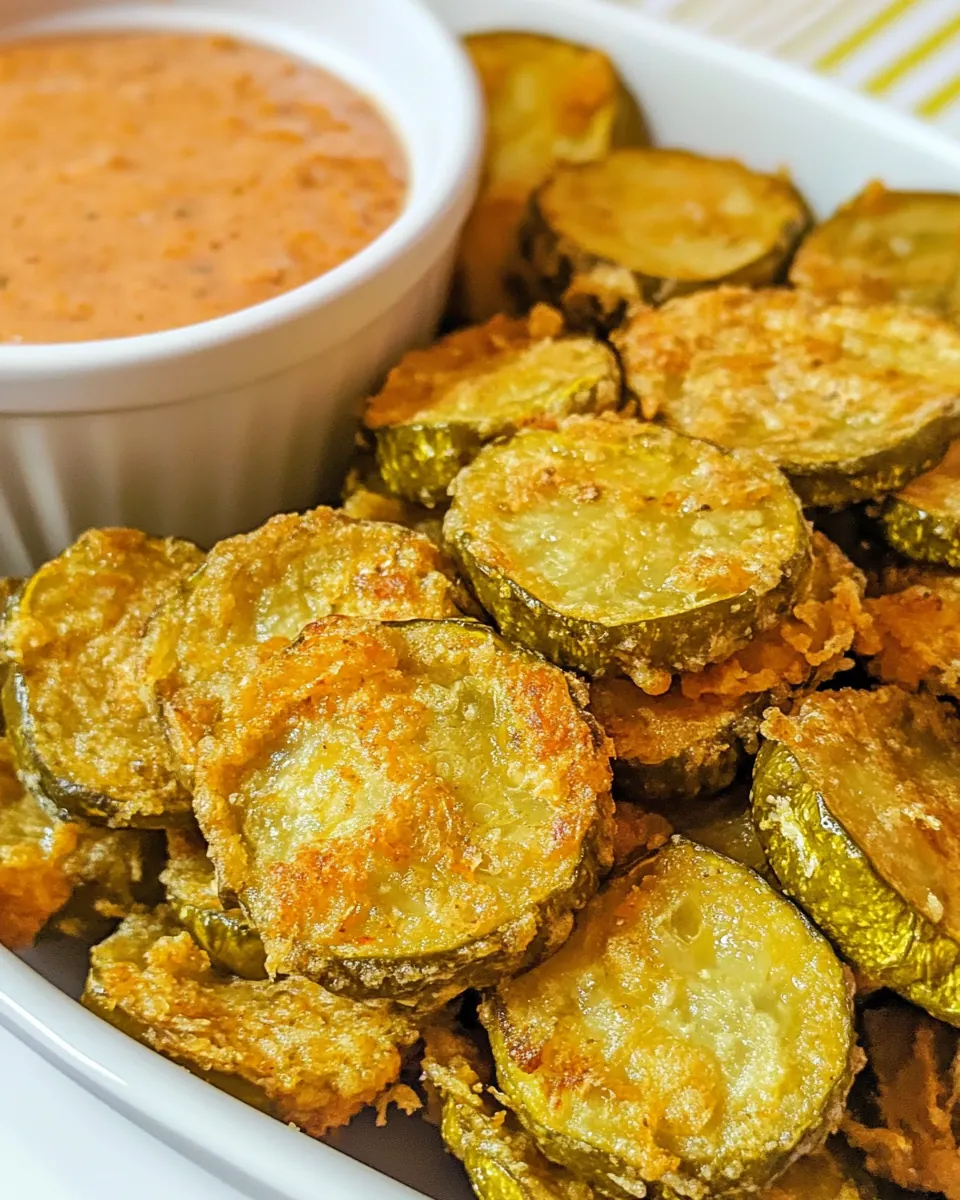
Serving This Air Fryer Fried Pickles
These crunchy bites are perfect for casual gatherings and party platters. I like to serve them warm with a simple dipping sauce, and they pair well with a range of side dishes. Below are practical serving ideas and occasions where they shine.
- As an appetizer: Serve a warm basket of Air Fryer Fried Pickles at the start of the meal for a playful, crunchy opener.
- Snack or game day food: They hold up nicely for casual nibbling during sports or movie nights, just keep them warm in short batches.
- Party platter component: Combine with other finger foods for a varied spread, placing the pickles near dips for easy access.
- Occasions: Great for lunch sides, casual dinners, backyard gatherings, and anytime you want a shareable snack with big flavor.
- Storage tips: Keep leftovers in an airtight container and reheat briefly in the air fryer to restore crispness rather than microwaving, which will soften the coating.
- Seasonal pairing: These work all year, offering a tangy, crunchy contrast to richer seasonal dishes when you want a bright bite.
FAQ
Conclusion
What makes this recipe special is its ability to turn humble jarred pickles into an addictive, crunchy snack with minimal oil and fuss. The method highlights contrast, giving you a tangy interior and a seasoned, golden crust that always gets attention. Give it a try the next time you want a quick shareable appetizer or a savory late night bite, and notice how small technique adjustments make a big difference. Enjoy the process and the smiles it brings.
Air Fryer Fried Pickles
Equipment
- Air Fryer
- Paper towels
- Medium Bowl
Ingredients
- 2 cups sliced dill pickles Provide a crisp, tangy base and deliver the characteristic briny crunch that defines fried pickle snacks; sliced dill pickles contribute moisture that helps batter adhere and adds a bright contrast to fried seasonings. Patting them dry before coating reduces excess liquid so oil now crisps the exterior instead of steaming it, yielding a crunchy bite. Choose firm slices to maintain texture through the air fryer cycle.
- 1 cup all-purpose flour Create a dry coating and binding layer that turns into a golden, crispy crust when air fried; all-purpose flour adds structure and lightness to the breading mix. Use even dredging to ensure each pickle slice receives consistent coverage for uniform browning. Adjust flour amount slightly if coating seems too thin or too thick to maintain texture balance.
- 1 tablespoon garlic powder Deliver savory depth and a mild aromatic garlic note that complements the pickles' acidity; garlic powder disperses evenly through the flour for balanced flavor. Incorporate it into the dry mix so each piece picks up subtle pungency without fresh garlic's moisture. Use measured amounts to avoid overpowering the other spices.
- 1 tablespoon onion powder Contribute a sweet, mellow onion flavor and help round out the spice blend; onion powder offers background savory tones that enhance overall seasoning. Mixing it into the flour ensures consistent distribution so every slice tastes uniform. Opt for finely ground powder to avoid gritty texture in the coating.
- 1 teaspoon smoked paprika Add a warm, smoky complexity and a subtle color boost to the breading; smoked paprika brings depth without adding heat. Sprinkle it into the dry mix to balance the tang of the pickles and the sharpness of other spices. Use smoked paprika for a nuanced roasted flavor profile.
- 1 tablespoon Cajun spice Provide bold, zesty seasoning with regional spice complexity that elevates the overall flavor; Cajun spice introduces savory, peppery, and aromatic elements to the crust. Blend it thoroughly with the flour so the coating has consistent seasoning and a pronounced savory kick. Adjust quantity to control the mixture's intensity.
- 1/8 teaspoon cayenne pepper Introduce sharp heat to brighten the seasoning blend and add a light, lingering spice on the finish; cayenne pepper increases warmth without altering texture. Use sparingly when combined with Cajun spice to achieve balanced heat that complements the tangy pickles. Measure carefully to avoid overwhelming other flavors.
- Olive oil Help promote even browning and create a crisp outer texture when applied lightly; olive oil assists in conducting heat across the coating during air frying. Toss or brush coated pickles with a small amount to encourage golden color while maintaining a lighter fry compared to deep frying. Choose a neutral or mild-flavored olive oil to avoid imparting strong fruity notes.
Instructions
- Preheat air fryer to 400 degrees F.: Warm, hot air is essential for rapid surface browning that produces crunch while keeping the interior tangy. You should smell a faint toasty hum from the unit as it reaches temperature, which tells you the circulation is ready. If you skip preheating, the coating may absorb oil and cook unevenly, resulting in a limp finish. A common mistake is overcrowding the basket before it reaches the target heat, which reduces crisping power.
- Drain sliced pickles on paper towels.: After blotting, the surface should feel slightly tacky but not wet, and you may see tiny beads of brine. Drying prevents steam from building under the coating, which would make the crust soggy. The why here is simple, moisture is the enemy of crispness. People often underestimate how much water comes from jarred pickles , so be patient and press gently to remove excess liquid.
- In a medium bowl, mix together flour and spices.: As you whisk, the aroma of garlic, onion, and smoked paprika will bloom, signaling an even distribution. This dry blend ensures each slice gets balanced seasoning without pockets of spice. If you rush this step, you may end up with clumps of seasoning that burn in the air fryer and create bitter spots. Sifting or stirring thoroughly prevents uneven flavor and texture.
- Coat sliced pickles with the flour mixture and arrange them in a single layer in the air fryer. Work in batches if needed.: When the flour clings evenly, the slices will look matte rather than patchy. Lay them with space around each piece so hot air circulates freely and the surfaces crisp uniformly. Crowding traps steam and yields soft centers, which is the most common error at this stage. If you notice flour falling off, gently press the coating so it adheres better before cooking.
- Spray with a cooking spray or drizzle with a bit of olive oil.: Lightly misting or drizzling adds the fat needed for browning, and you should see a faint sheen on the coating. The oil helps Maillard reactions create golden color and that irresistible crunch. Applying too much will make the pieces greasy rather than crisp, so use a measured touch. If you only have a bottle, use a spoon to distribute small amounts and spread it thinly with your fingers or tongs.
- Cook for 10 minutes then flip them over and cook for an additional 5 minutes.: In the first cook, you will hear a soft crisping sound, and the edges will start to turn golden. After flipping, the other side should mirror that color and the aroma will shift toward toasted spices and browned starch. This two stage approach gives even color on both sides while preventing burning. A common pitfall is leaving the basket closed without checking, which can allow some pieces to go from golden to overly dark quickly. If any pieces seem to brown fast, reduce the final cook time by a minute or two and check more frequently.
Notes
- Pat dry before coating: Ensure the pickles are well dried so the flour clings instead of turning pasty.
- Work in small batches: Overcrowding reduces airflow and produces soggy results, so cook in shifts for even crispness.
- Use a light spray of oil: A thin mist or a teaspoon spread evenly browns the coating without making it greasy.
- Press coating gently: After dredging, press the flour mix onto the slices to improve adhesion and reduce flaking during cooking.
- Watch the final minutes: The difference between golden and burned can be just a minute, so check often toward the end of the cook time.
- Try adding cornstarch: Mixing a little cornstarch with the flour helps create an extra-crispy crust as noted in the recipe notes.